一、进入ubuntu 端
1、下载
先下载nginx源码,可以通过以下链接自行下载,
http://nginx.org/en/download.html
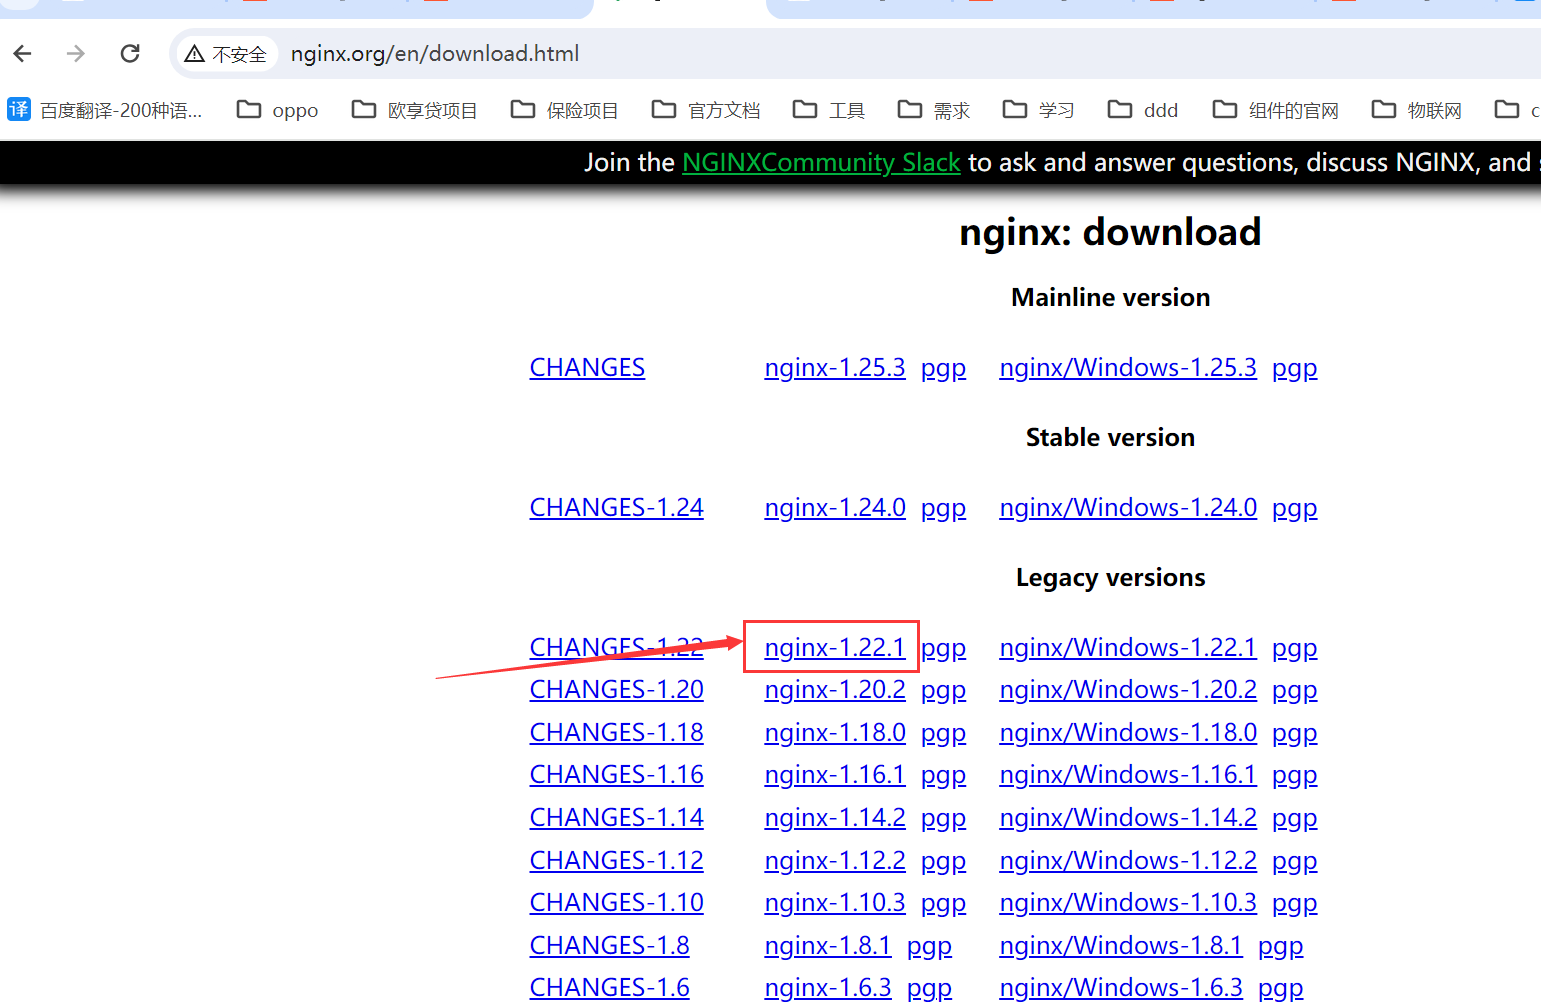
也可以直接通过此连接直接下载,我这边选择的是 1.22.1版本;
http://nginx.org/download/nginx-1.22.1.tar.gz
2、解压
tar -zvxf nginx-1.22.1.tar.gz
解压后先不要构建和安装
为了避免出现权限问题,我们先将解压好的目录加上最高权限
chmod 777 ./nginx-1.22.1
3、安装gcc、 cmkake 23版本以上
请自行百度安装,也可以看我的博客内有教程
二、切换到windows端
1、clion 添加工具链
选择Build,Execution,Deployment -> Toolchains(工具链)-> 添加 Remote host
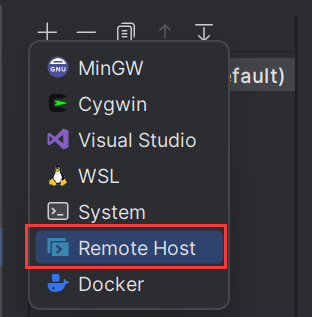
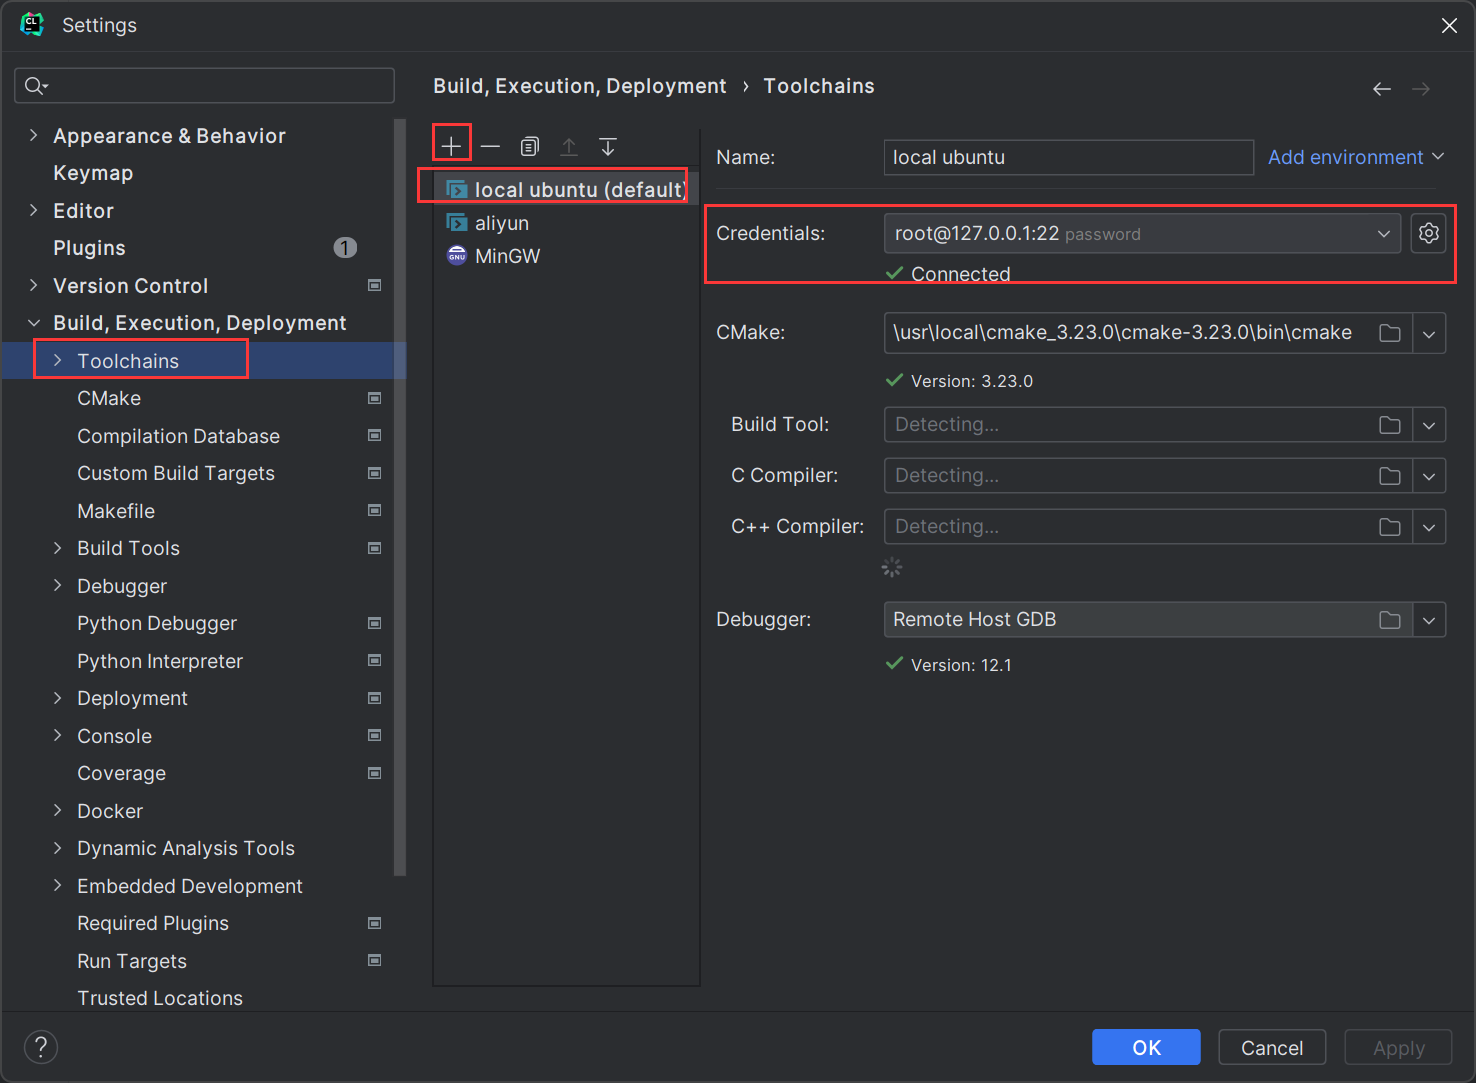
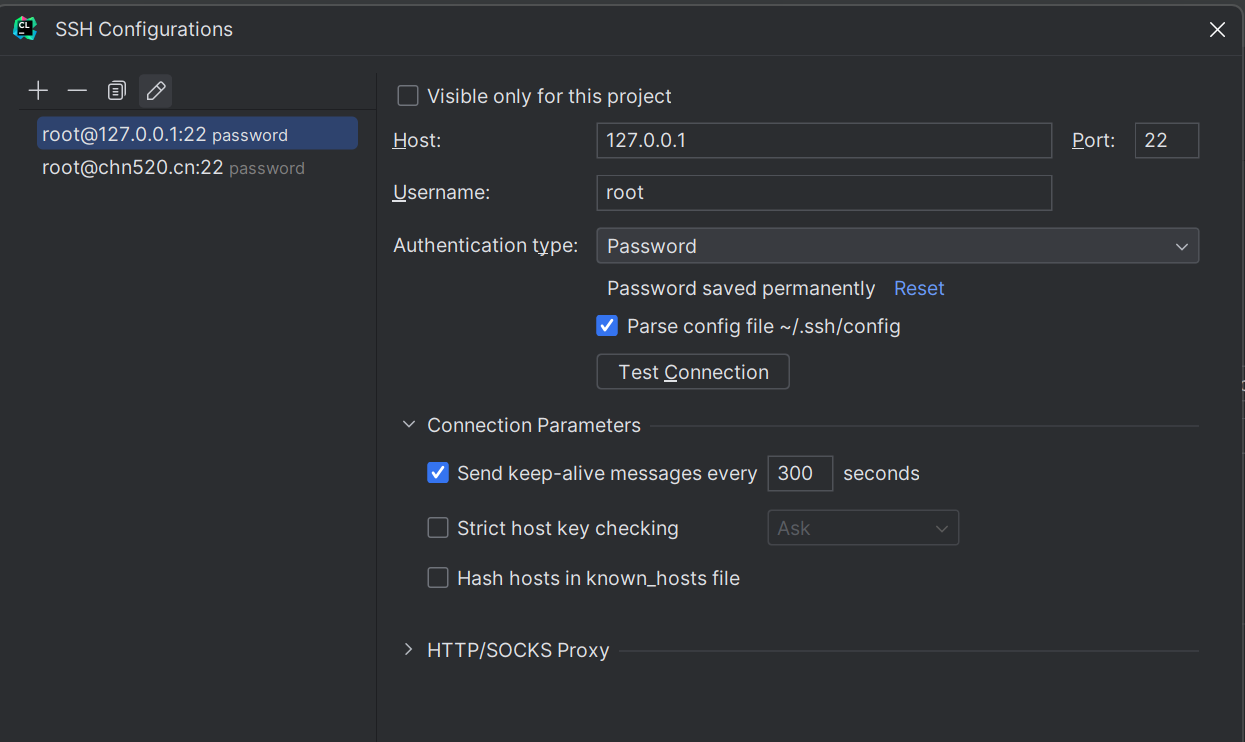
注意需要先配置好SSH configuration
2、clion配置远程开发配置
添加远程开发的作用是可以将windows和ubuntu之间的文件互相同步,这样就不需要将文件拷来拷去了;
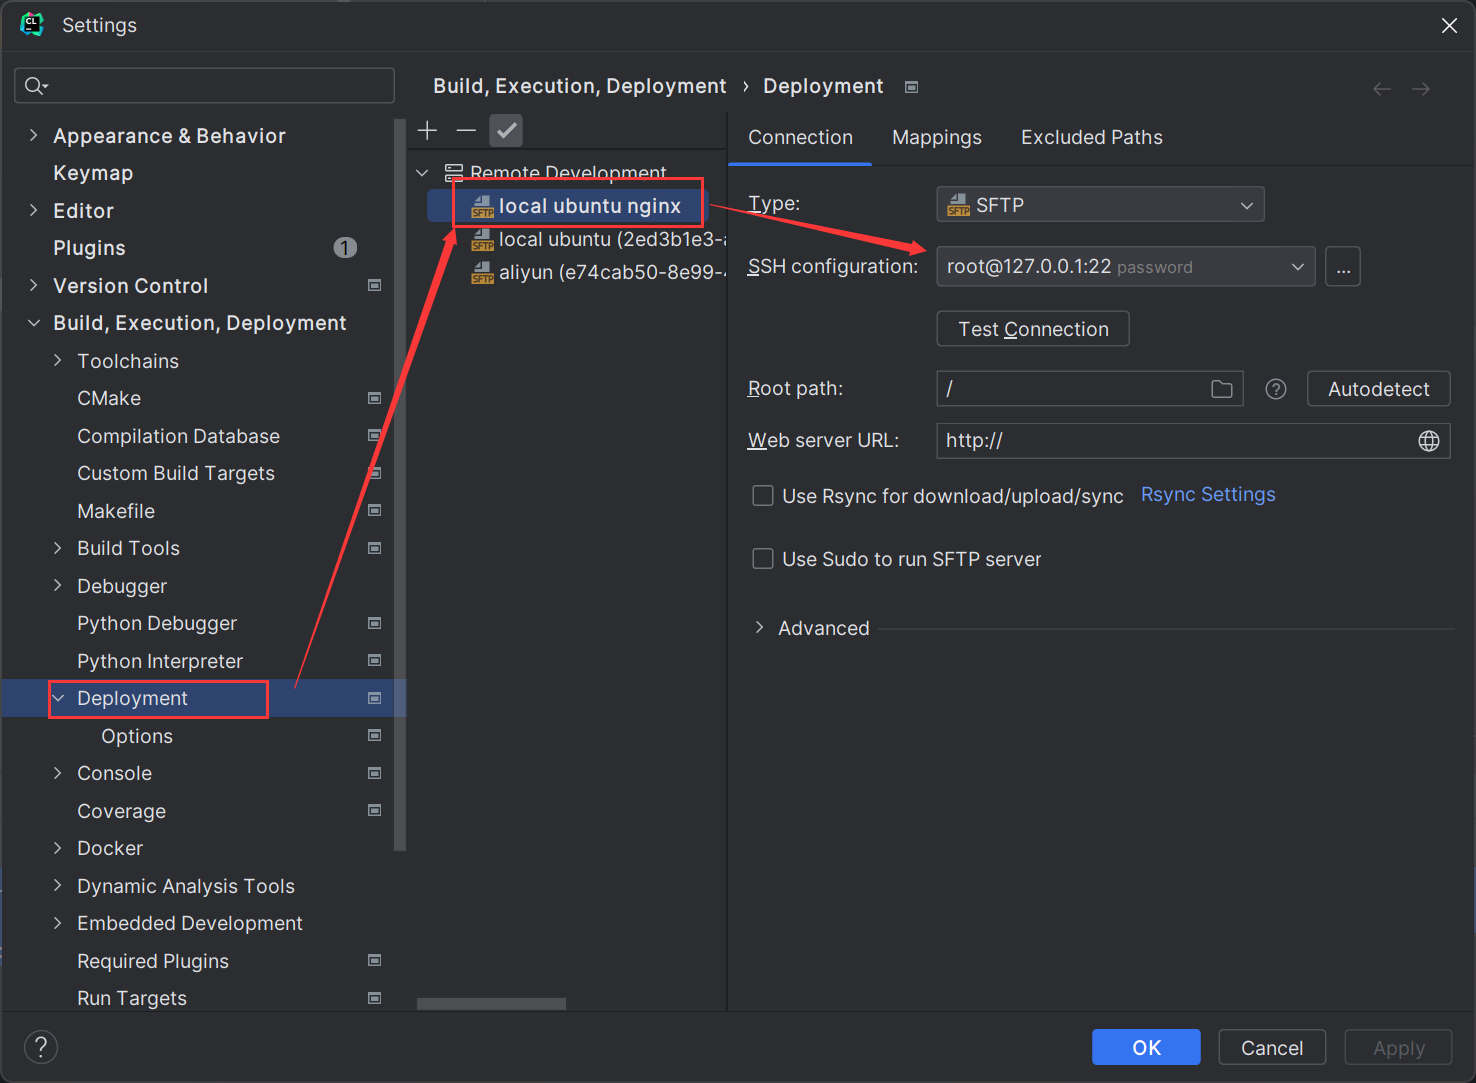
打开设置-> 选择 Deployment -> 添加一个 SFTP 的远程开发

添加好后是这样的,SSH configuration 选择刚刚配置好的
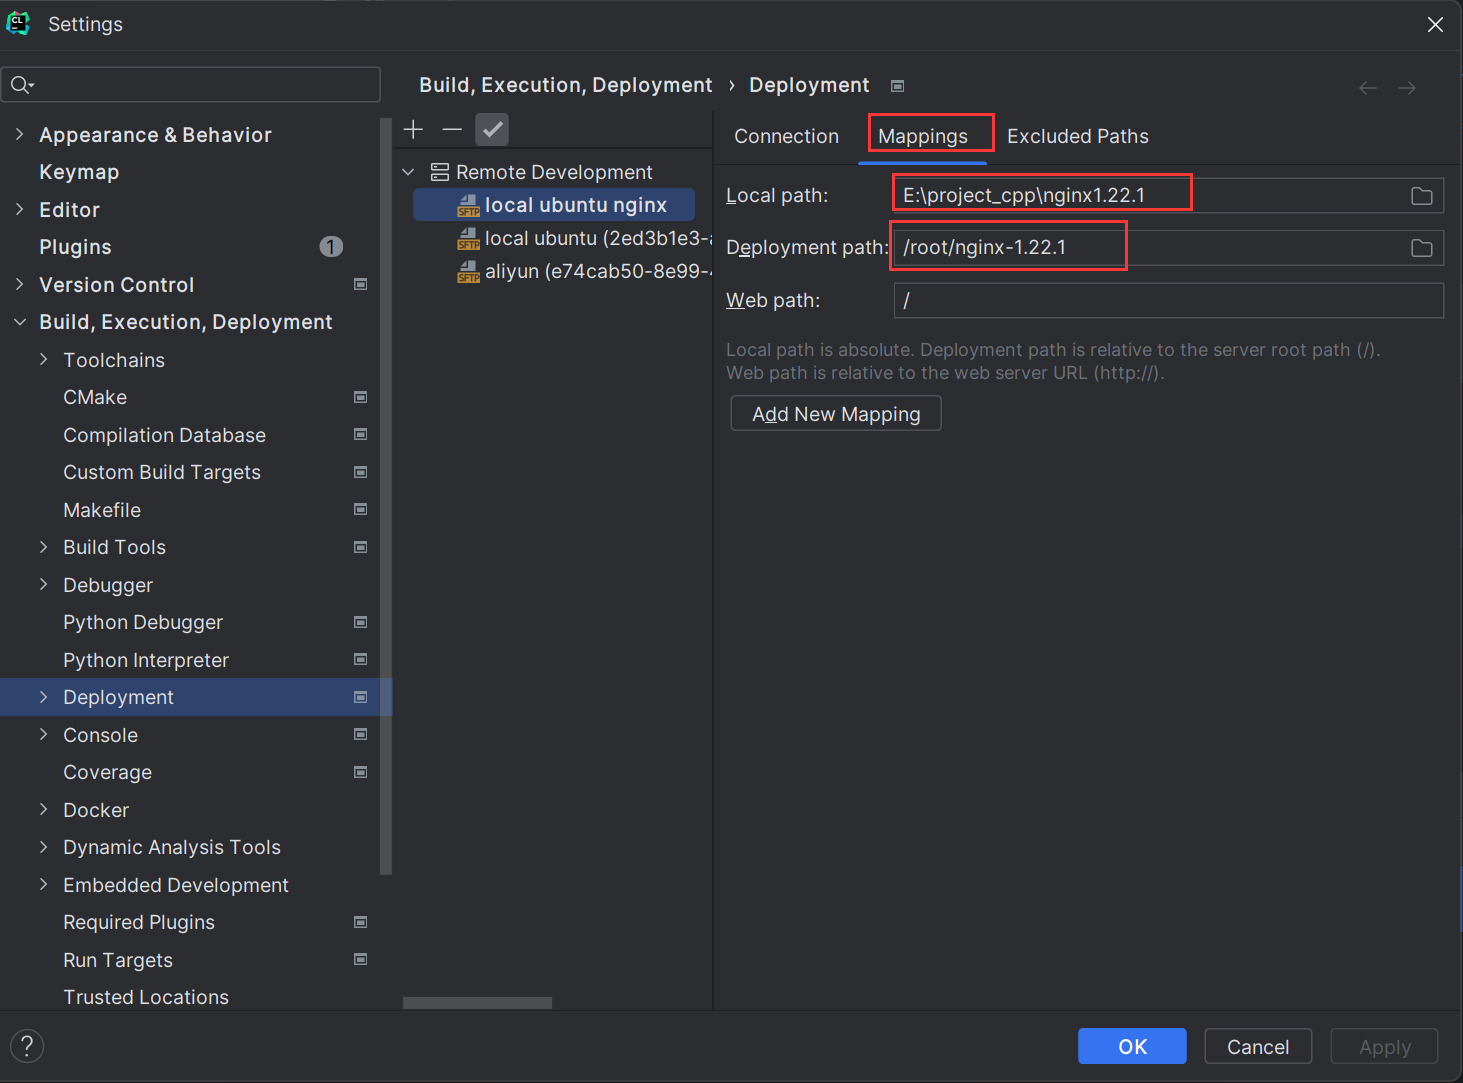
然后切换到Mappings(映射tab页),Local Path 表示windows本地的路径,Deployment path 表示ubuntu的远程路径,
以下例子是将windows 的E:\project_cpp\nginx1.22.1路径,映射到ubuntu的 /root/nginx-1.22.1路径,这样两个不同的系统之间就完成互相同步;
下载
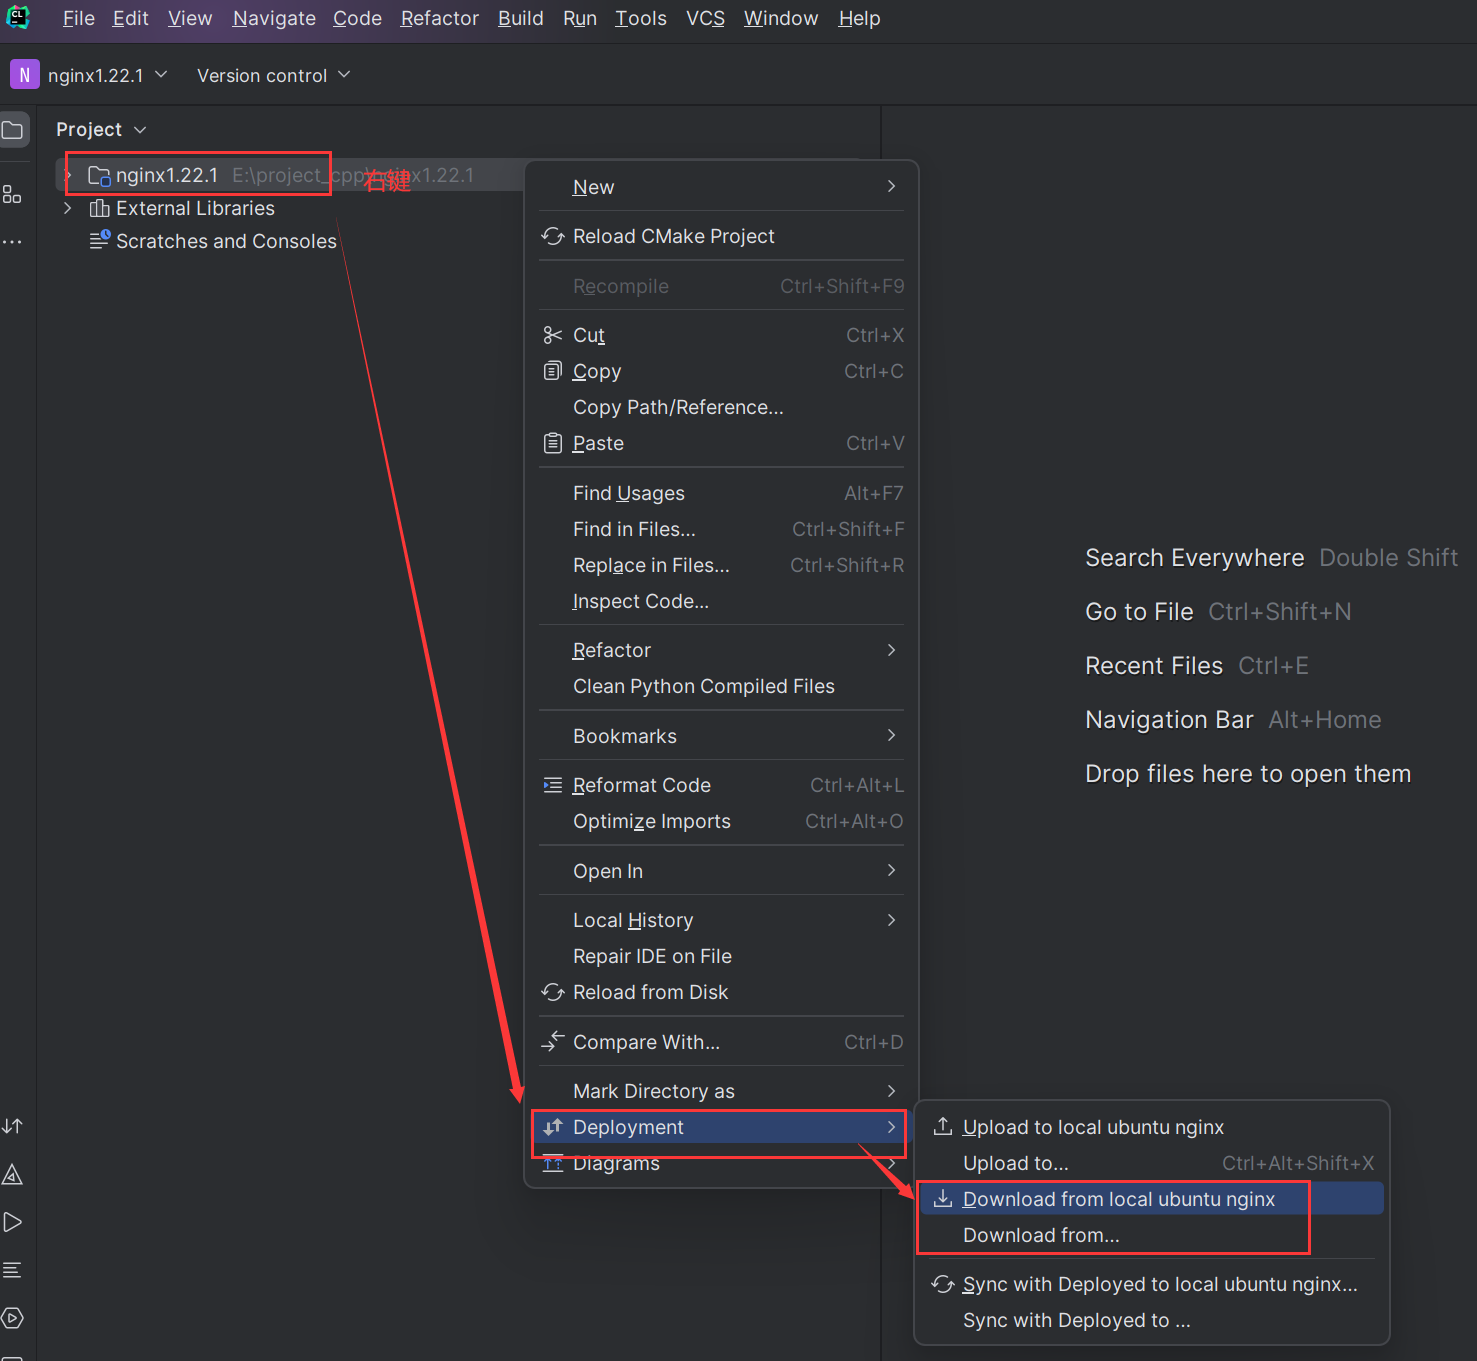
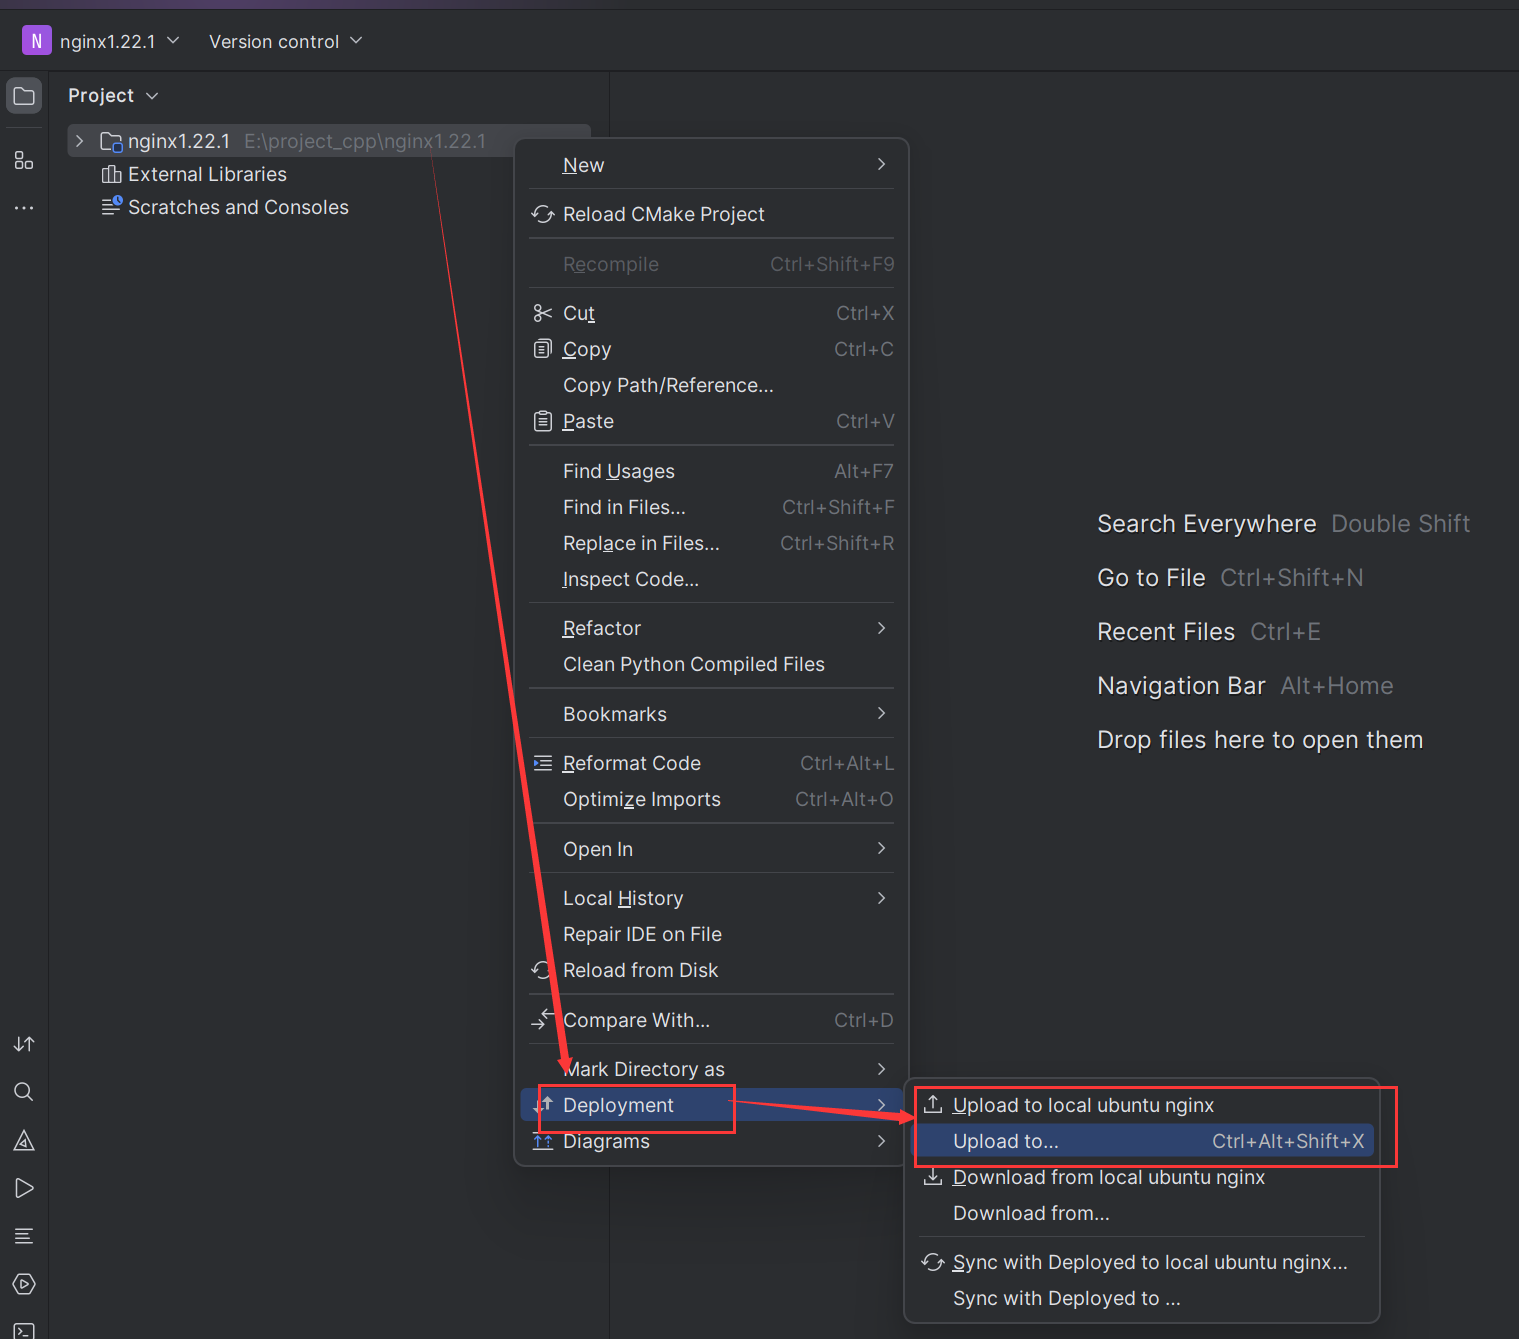
设置好之后,右击项目目录 -> Deployment -> Downloan from ...(选择刚刚配置好的远程开发SFTP) 或者直接选择 Downloan from local ubuntu nginx也可以
经过一段进度条之后就会将nginx的源码下载下来了
上传
如果想要将本地的文件上传上去,只需要选择 upload to … 即可
自动上传配置
当然,以上方法是手动上传文件,如果想要实现自动上传,可以在 Tools -> Deployment -> Automatic Upload(Always) 打上勾,即可实现自动上传功能;

2、转换cmake
默认情况下,nginx是一个make项目,我们需要将其转为cmake项目,就需要 CMakeLists.txt 文件,
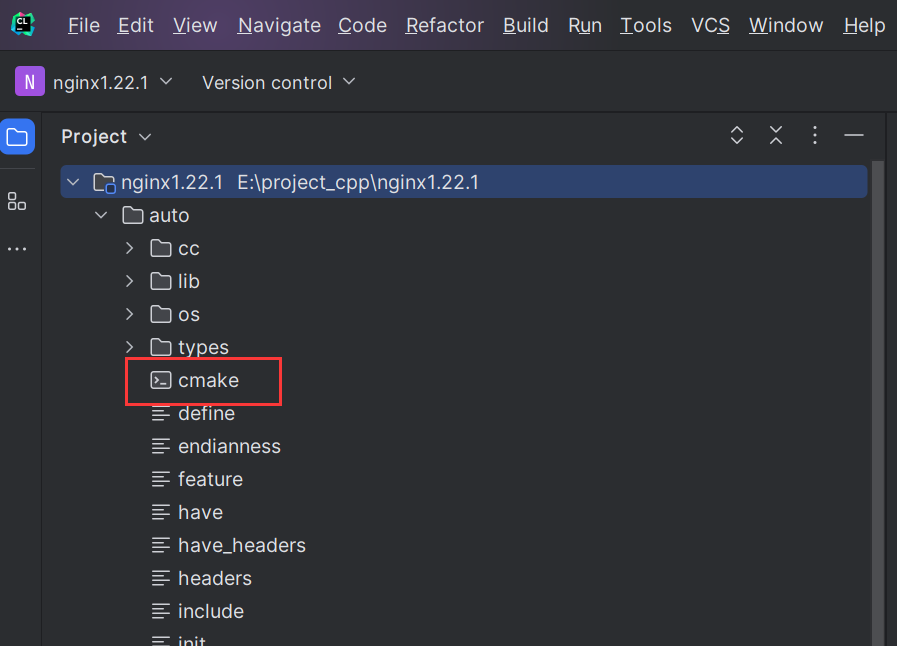
在auto目录下新建一个 cmake 文件,内容如下
#!/usr/bin/env bash#NGX_CMAKE_FILE=$NGX_OBJS/CMakeLists.txt#********此处生成到项目跟目录,修改$NGX_OBJS/CMakeLists.txt为CMakeLists.txtNGX_CMAKE_FILE=CMakeLists.txtNGX_CMAKE_TMP=$NGX_OBJS/tmp#output includescmake_ngx_incs=`echo $CORE_INCS $NGX_OBJS $HTTP_INCS $MAIL_INCS\| sed -e "s/ *\([^ ][^ ]*\)/$ngx_regex_cont\1/g" \-e "s/\//$ngx_regex_dirsep/g"`cat << END > $NGX_CMAKE_TMPcmake_minimum_required(VERSION 3.6)include_directories(.$cmake_ngx_incs)END#output srccmake_ngx_src="$CORE_SRCS $HTTP_SRCS $MAIL_SRCS $NGX_MISC_SRCS $NGX_ADDON_SRCS $NGX_SHARED_SRCS"cmake_ngx_src=`echo $cmake_ngx_src | sed -e "s/ *\([^ ][^ ]*\)/$ngx_regex_cont\1/g"\-e "s/\//$ngx_regex_dirsep/g"`#******** 次数将ngx_modules.c修改为$NGX_OBJS/ngx_modules.ccat << END >> $NGX_CMAKE_TMPset(SOURCE_FILES$NGX_OBJS/ngx_modules.c$cmake_ngx_src)END#output targetcat << END >> $NGX_CMAKE_TMPadd_executable(nginx \${SOURCE_FILES})END#output libecho ${CORE_LIBS}CMAKE_CORE_LIBS=`echo ${CORE_LIBS} | sed -e "s/-l//g"`cat << END >> $NGX_CMAKE_TMPtarget_link_libraries(nginx $CMAKE_CORE_LIBS)ENDif [ -f $NGX_CMAKE_TMP ]then(cat $NGX_CMAKE_TMP | sed -e "s/\\\//g") > $NGX_CMAKE_FILErm $NGX_CMAKE_TMPfi
创建好之后如下图
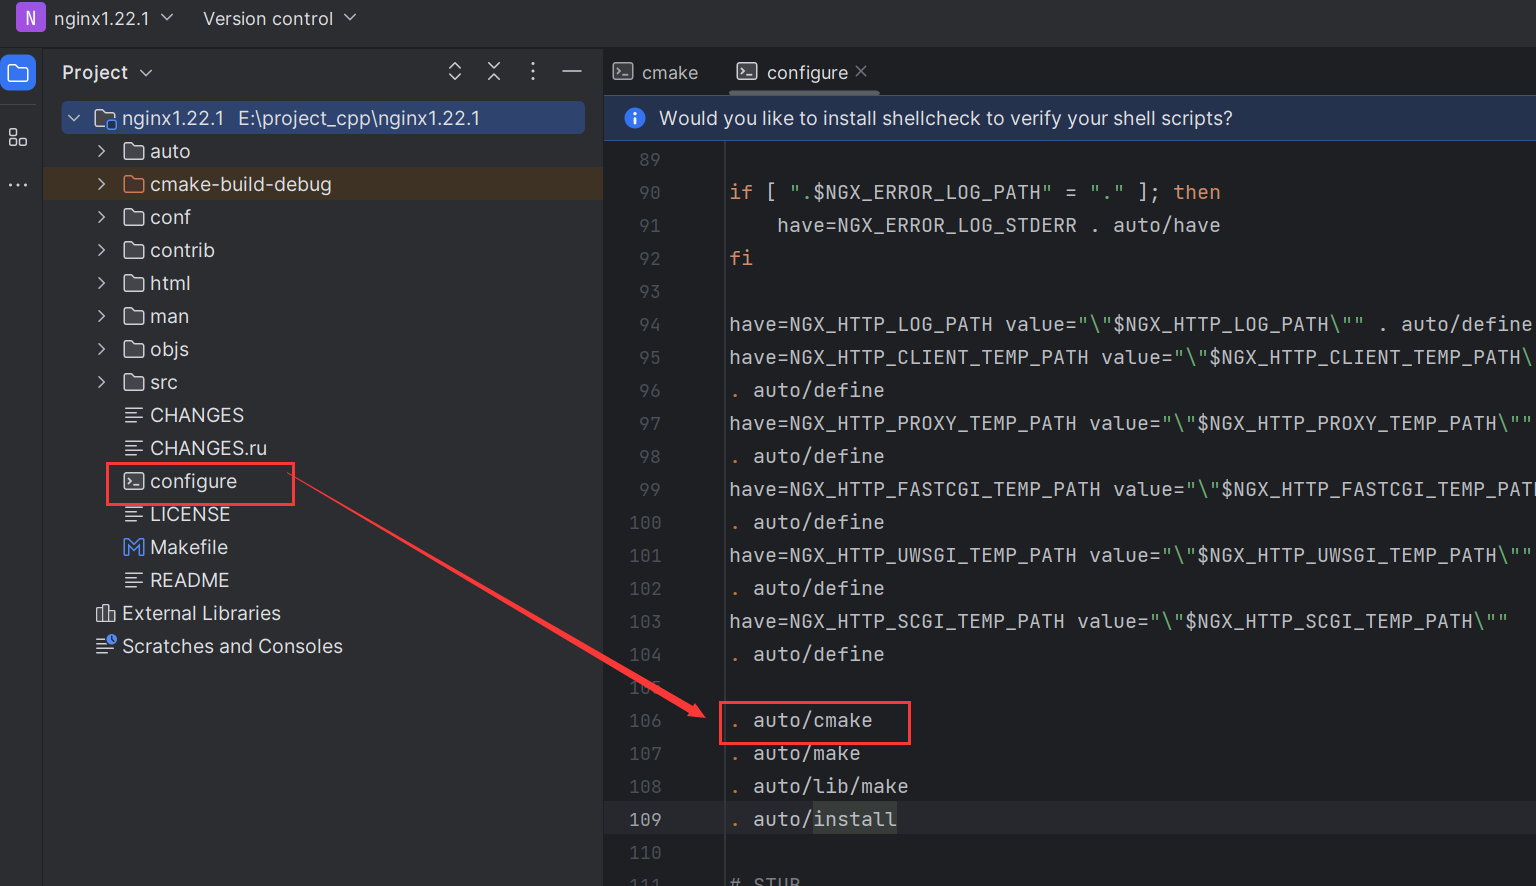
然后在configure文件的 . auto/make 上面加上 . auto/cmake ,注意一定要加在 auto/make 上面,否则安装无法通过
三、切换到ubuntu
1、构建nginx
在nginx解压后所在的目录运行以下命令
./configure如果是模块开发,需要加上模块的目录./configure --add-module=/root/nginx-1.22.1/modules
若出现 not found 错误解决
root@PAw9033927:~/nginx-1.22.1# ./configure: not found: 2:: not found: 5:: not found: 6:: bad variable nameort: LC_ALL
一般出现这种情况,是操作系统编码格式不同导致的,在windows中是CRLF,在linux系统是LF,在macos是LR;
使用git clone xxx执行下载代码后,在windows系统会自动转为 CRLF 格式;
在服务器上,ubuntu系统中,先使用vi命令打开脚本,然后通过以下命令即可查询到编码格式,如果为dos,那么我们需要修改编码格式,如果格式是unix,那么不要需要修改。
:set ff
修改编码格式
:set ff=unix# 或者:set fileformat=unix### 最后通过存盘退出:wq
最优解
但是这种方法只能一个个改,如果我们需要修改整个项目的编码格式,这种方式是不可取的,最好的解决方案就是直接在linux 系统上 clone 代码,而不是在 windwos 上 clone
pcre缺失
如果出现以下报错,表示缺少PCRE库;
./configure: error: the HTTP rewrite module requires the PCRE library.You can either disable the module by using --without-http_rewrite_moduleoption, or install the PCRE library into the system, or build the PCRE librarystatically from the source with nginx by using --with-pcre=<path> option.
通过以下命令安装pcre
sudo apt-get install libpcre3 libpcre3-dev -y
zlib缺失
若出现以下错误
./configure: error: the HTTP gzip module requires the zlib library.You can either disable the module by using --without-http_gzip_moduleoption, or install the zlib library into the system, or build the zlib librarystatically from the source with nginx by using --with-zlib=<path> option.
通过以下命令安装zlib
sudo apt-get install zlib1g-dev -y
重新构建
出现以下内容就表示安装成功
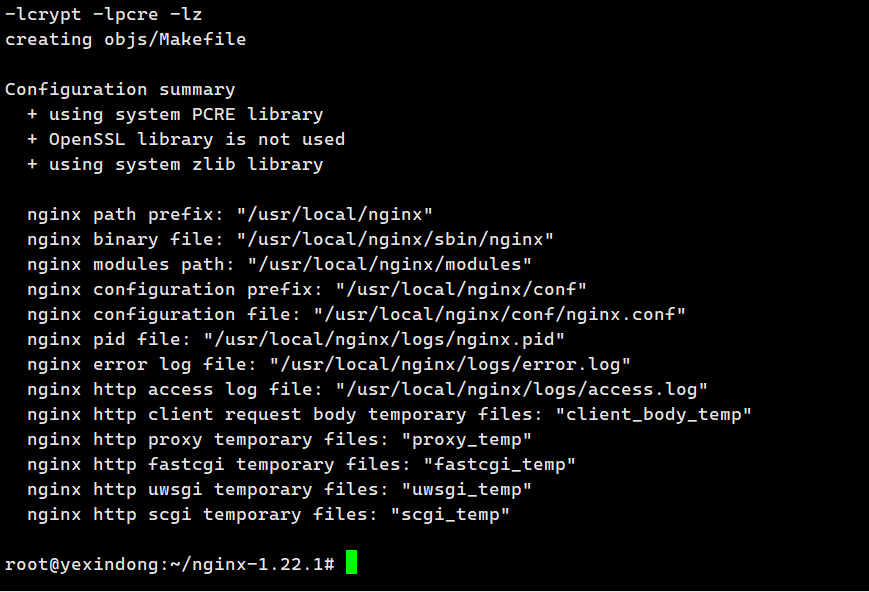
到这一步,ubuntu的工作就已经做完了;
四、切换到windows
加载 cmake
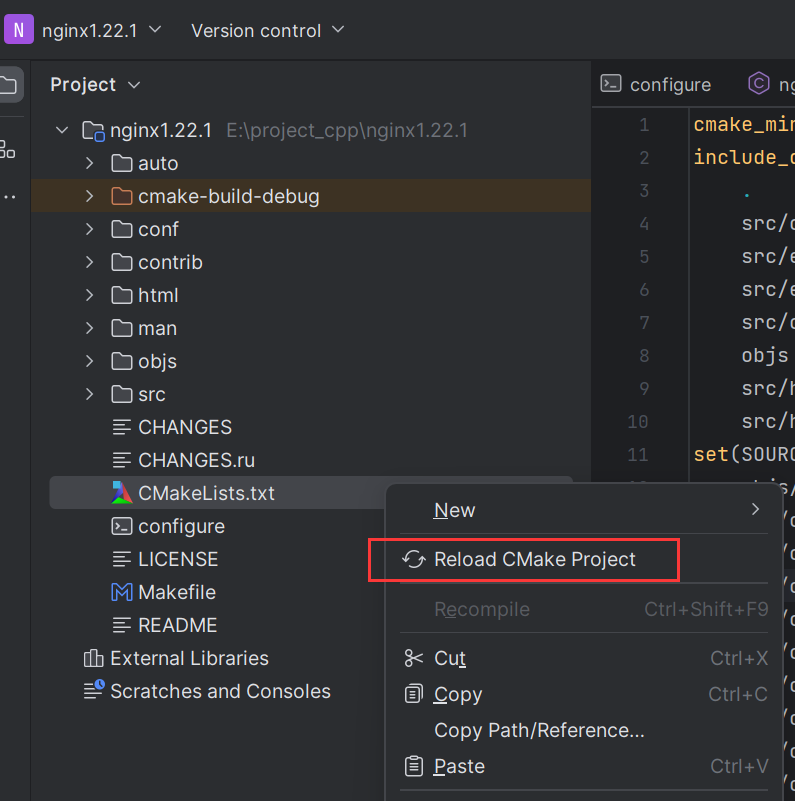
刚刚构建后,通过 Deployment Download from … 下载文件后就可以看到,项目中多出了一个CMakeLists.txt文件,这个就是cmake的关键文件;

右键CMakeLists.txt文件,选择 Reload CMake Project
警告处理(可不处理)
重新加载后,有个警告
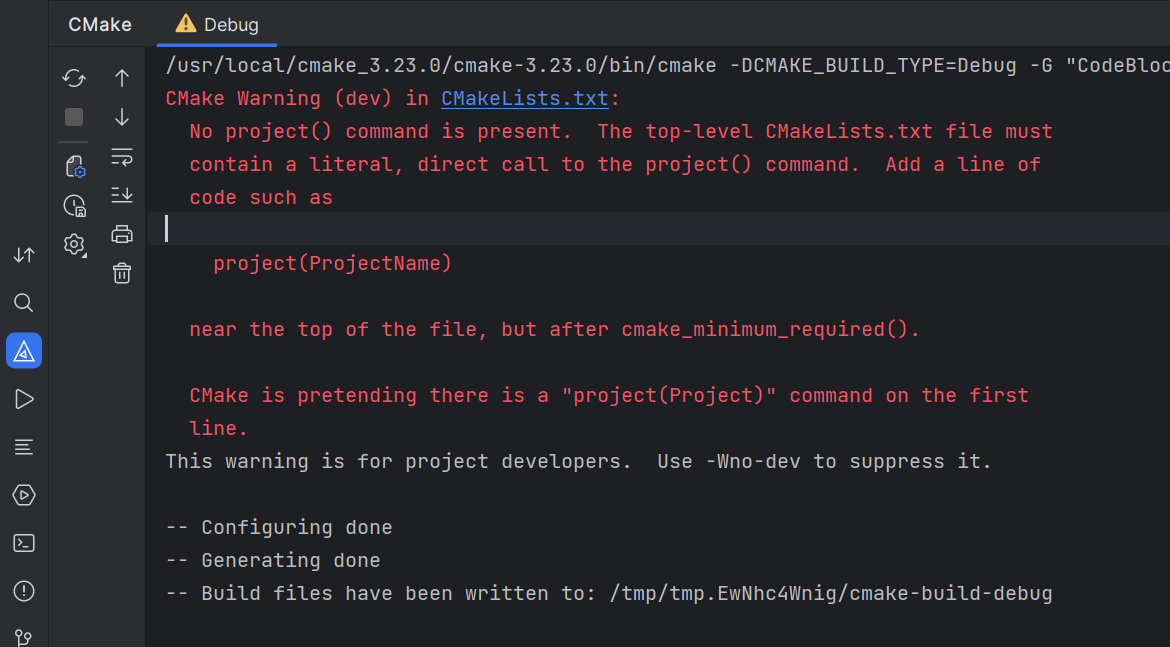
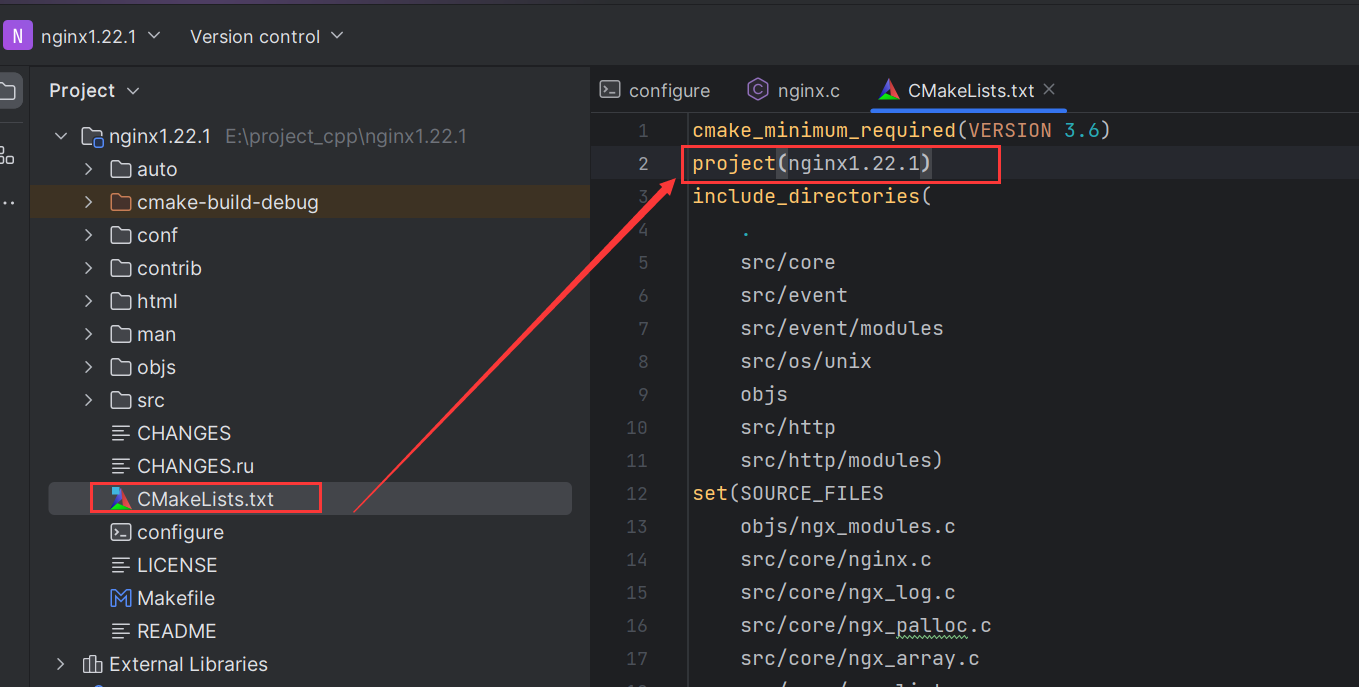
意思是必须在CMakeLists.txt文件头部加上 project(项目名称),表示这个项目的名字,这个可以不处理,不会影响运行,但我是个强迫症,既然这样我们就加上呗
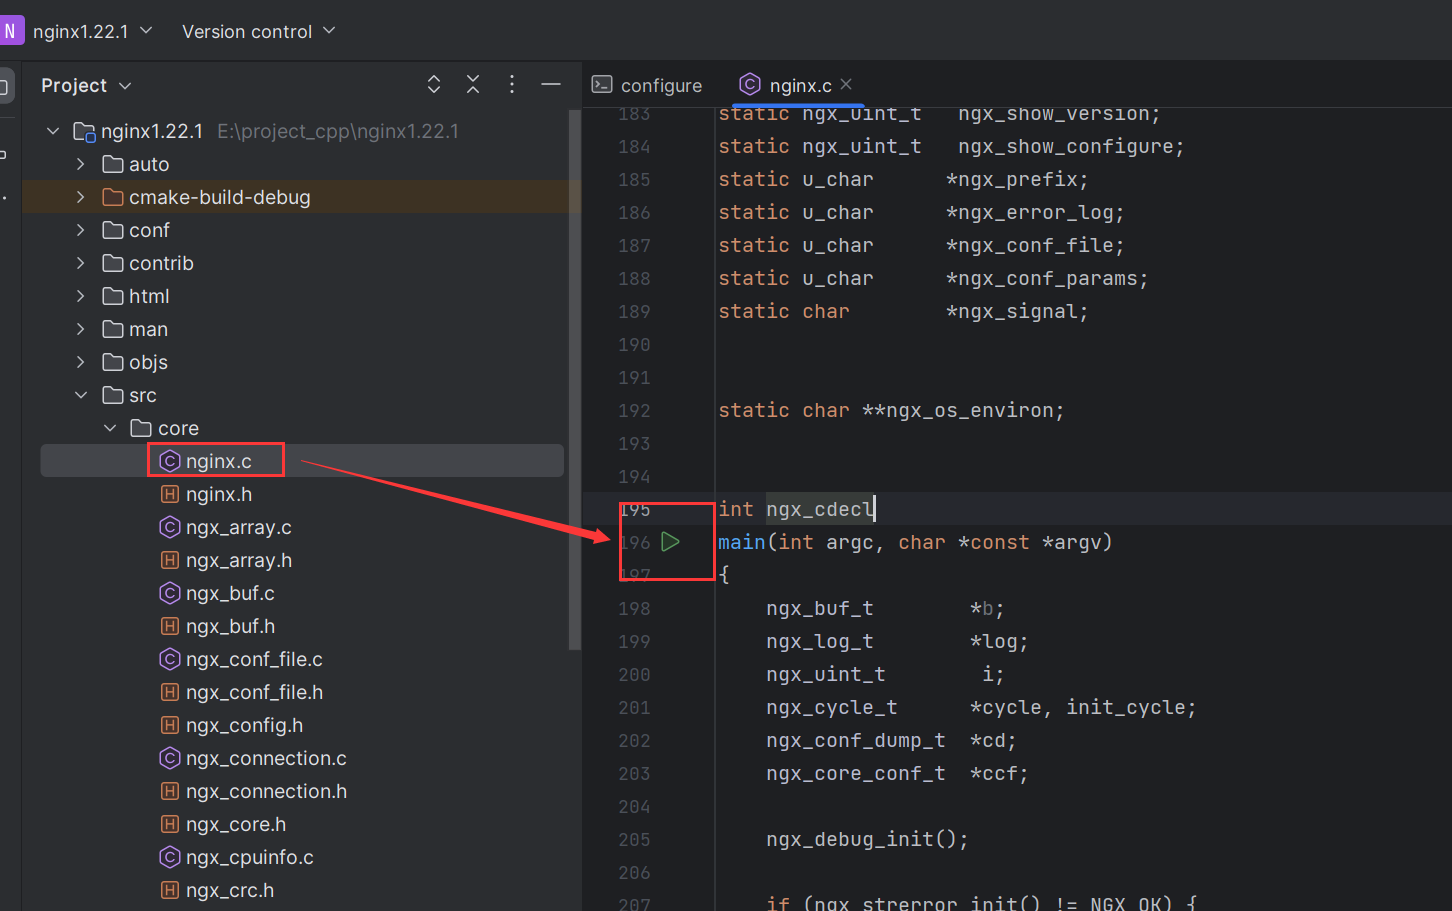
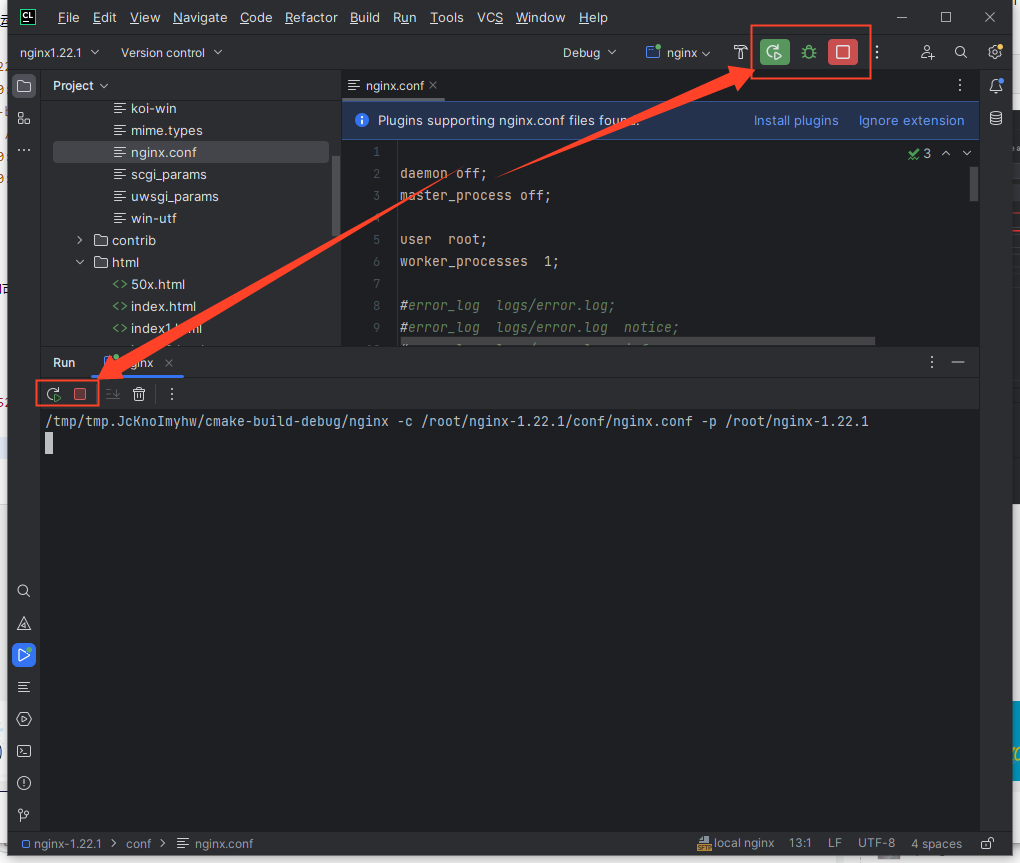
运行nginx
找到 src/core/nginx.c 文件,运行里面的main函数
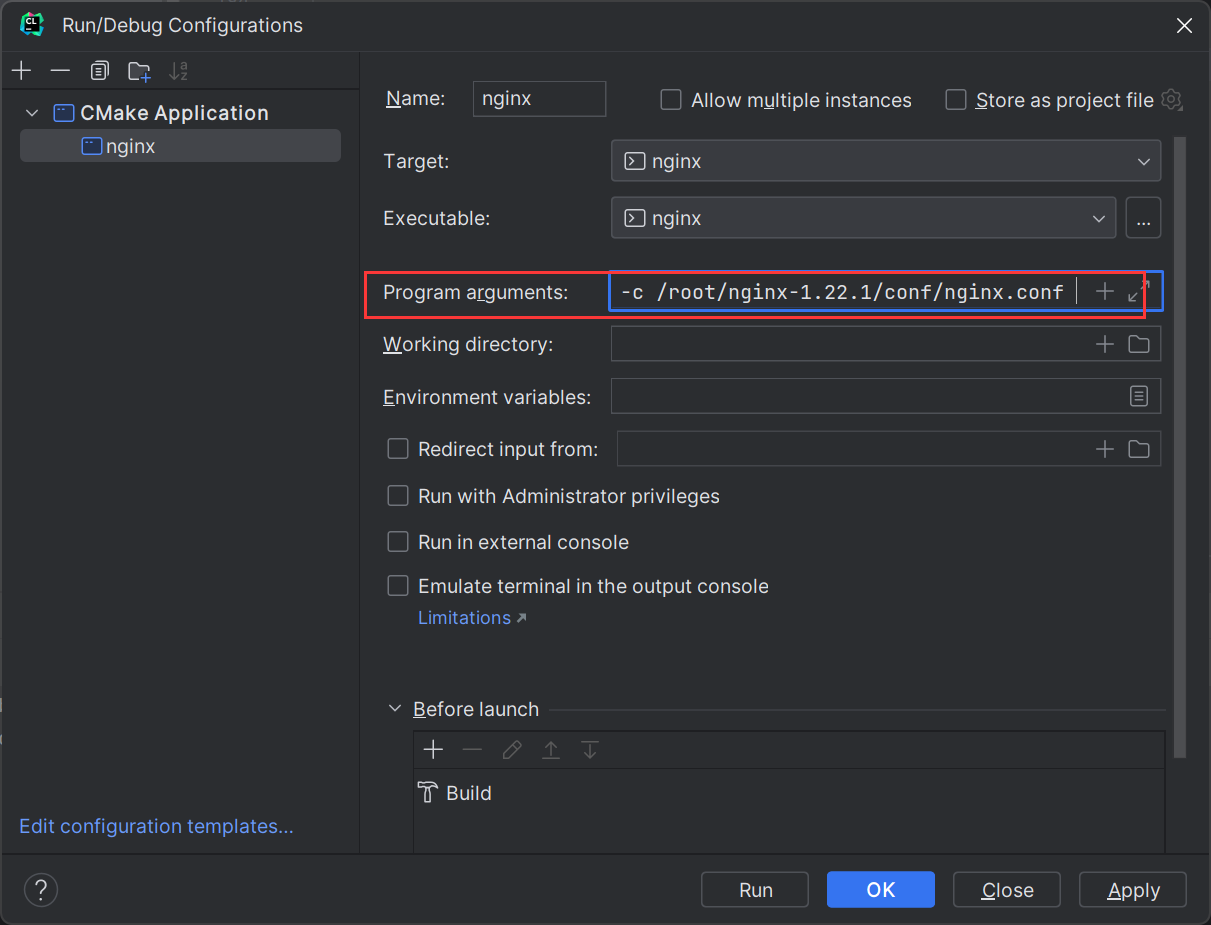
在运行的配置里面
Program arguments加入以下配置,指定nginx的配置文件
-c /root/nginx-1.22.1/conf/nginx.conf
运行报错解决
运行后报错了,信息如下,意思是/usr/local/nginx/这个目录不存在;
/tmp/tmp.EwNhc4Wnig/cmake-build-debug/nginx -c /root/nginx-1.22.1/conf/nginx.confnginx: [alert] could not open error log file: open() "/usr/local/nginx/logs/error.log" failed (2: No such file or directory)2023/12/05 22:53:12 [emerg] 12732#0: mkdir() "/usr/local/nginx/client_body_temp" failed (2: No such file or directory)
通过nginx的帮助命令可以看到,默认的前缀是/usr/local/nginx/;
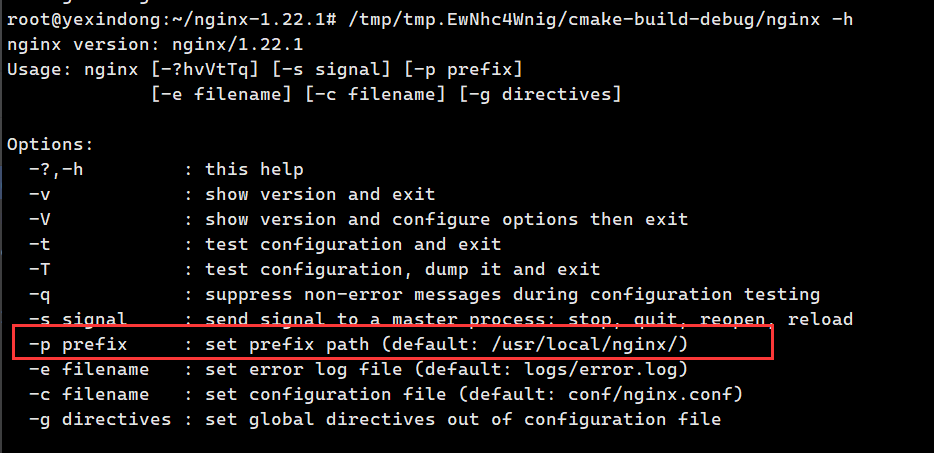
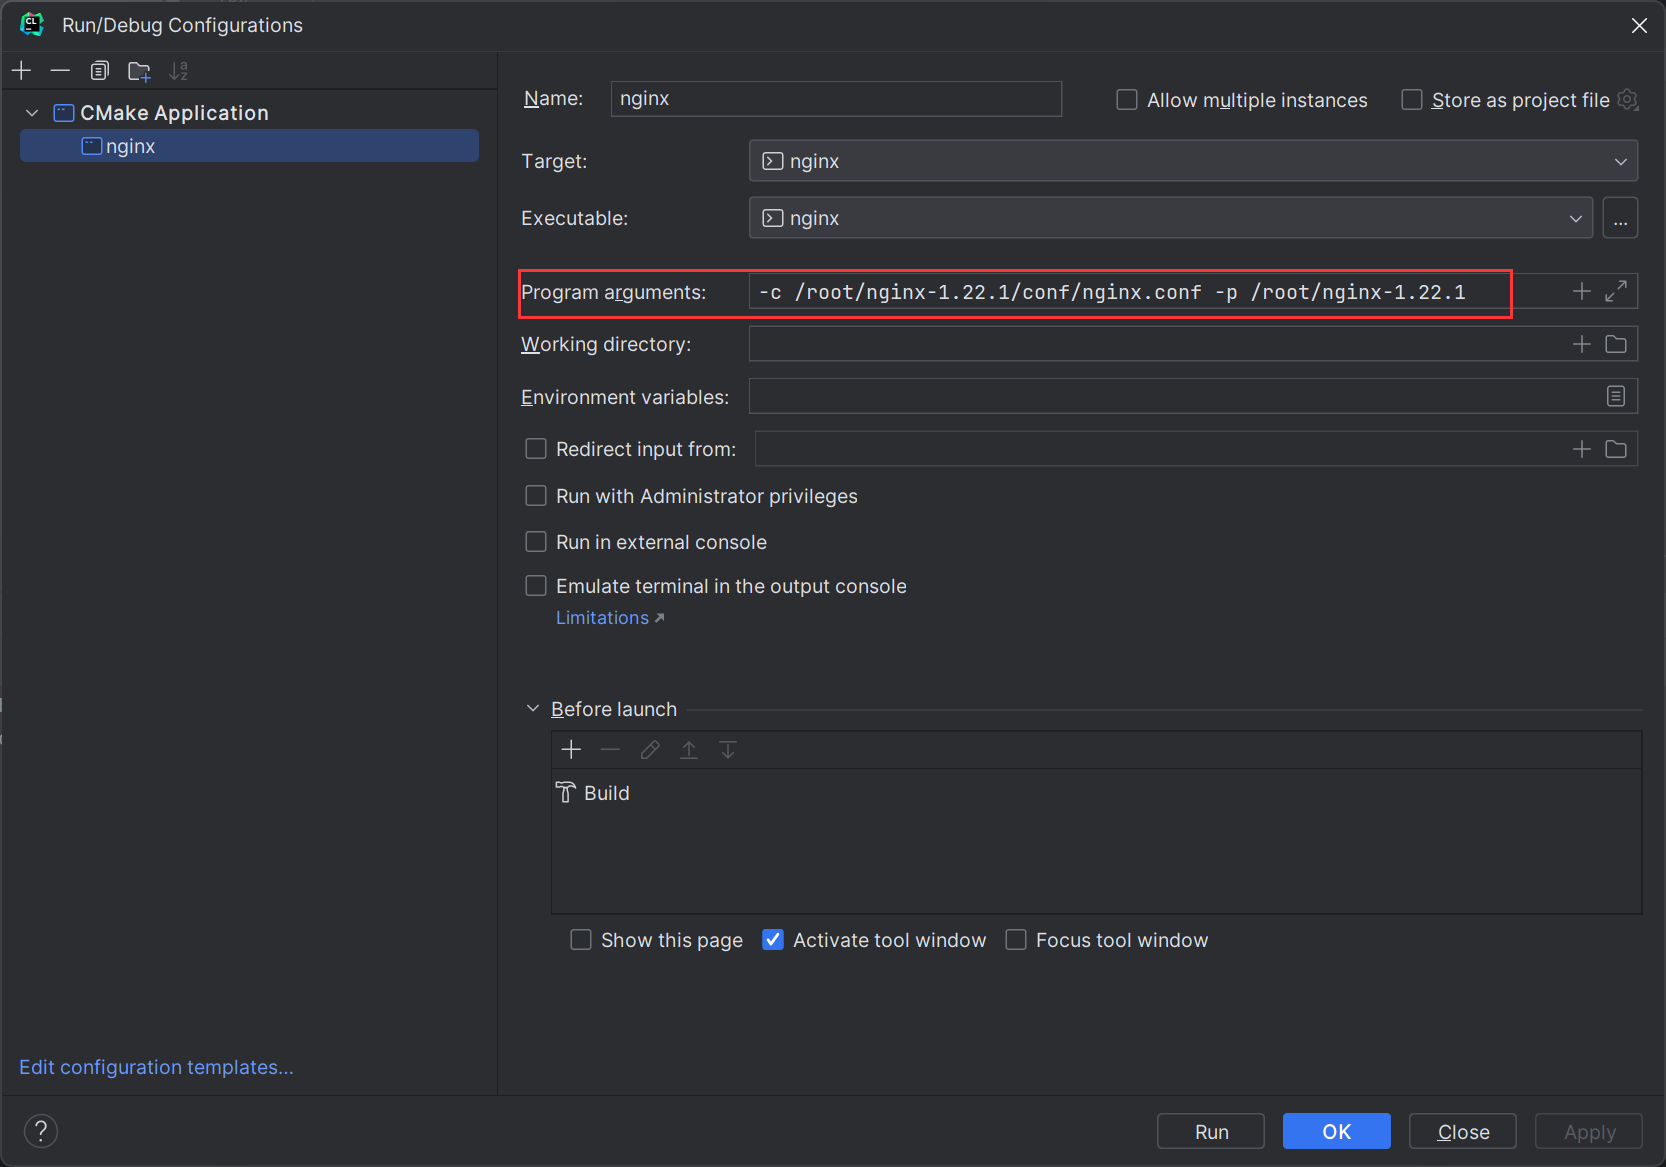
所以我们在启动的时候只需要加上-p参数修改下前缀就行了,在启动配置里面 Program arguments加入以下配置
-c /root/nginx-1.22.1/conf/nginx.conf -p /root/nginx-1.22.1
得注意下哈,日志是放在 /root/nginx-1.22.1/logs目录下的,logs 这个目录得自己手动创建
mkdir /nginx-1.22.1/logs
再次启动(后台运行)
当看到以下信息时就表示已经启动成功了
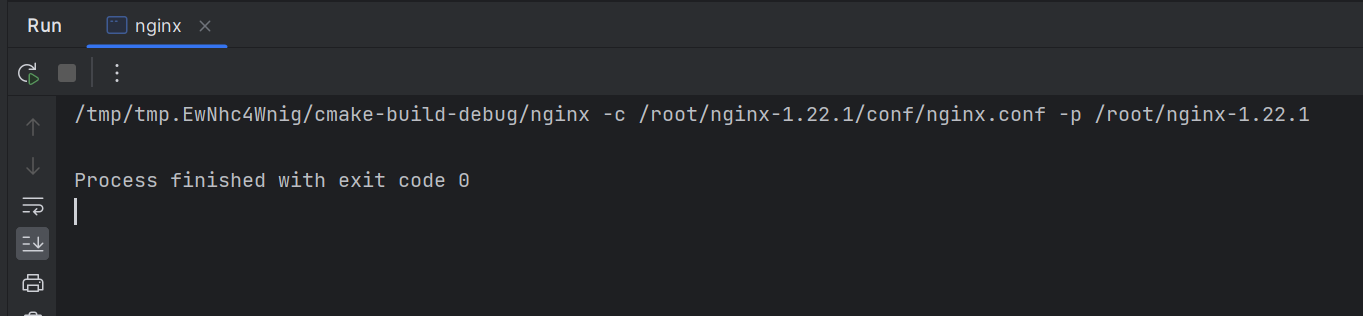
只是默认情况下,nginx的后台运行的,在ubuntu通过ps命令即可看到正在运行的nginx进程
root@yexindong:~/nginx-1.22.1# ps -ef | grep nginxroot 17168 14 0 00:15 ? 00:00:00 nginx: master process /tmp/tmp.EwNhc4Wnig/cmake-build-debug/nginx -c /root/nginx-1.22.1/conf/nginx.conf -p /root/nginx-1.22.1nobody 17169 17168 0 00:15 ? 00:00:00 nginx: worker processroot 17171 1801 0 00:15 pts/0 00:00:00 grep --color=auto nginx
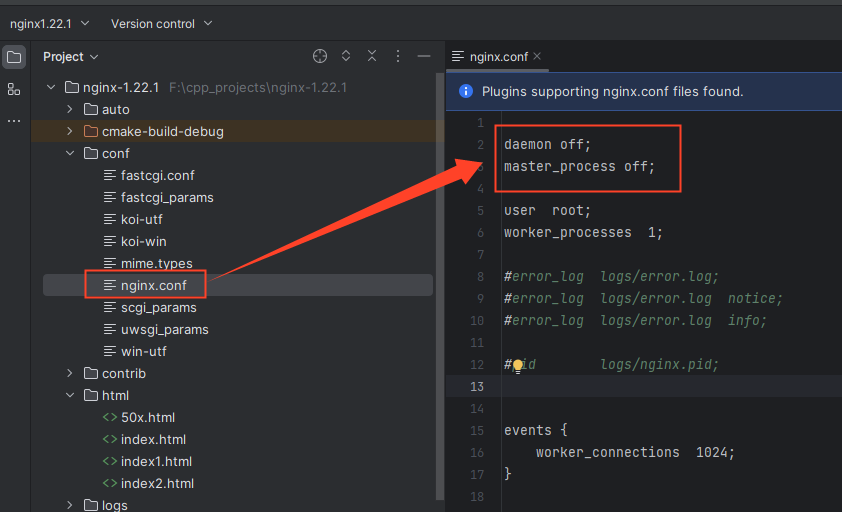
设为单进程模式工作(前台运行)
在 nginx.conf 加入以下2行即可
daemon off;master_process off;
然后再次启动nginx,就会直接在前台运行,而不是后台运行,这时候想要debug也是可以的
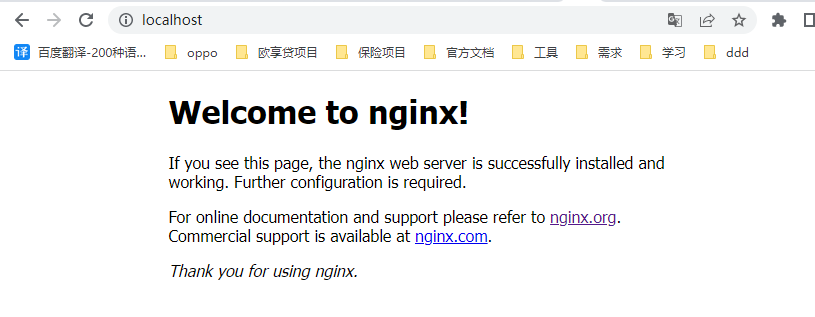
访问
默认情况下用的80端口,输入:127.0.0.1 进行访问,发现无法访问,
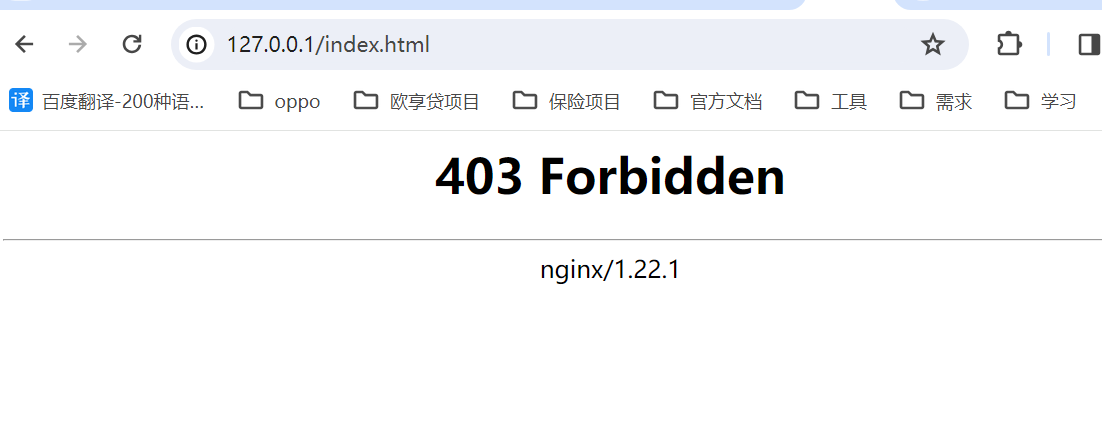
查看 error.log 日志,发现以下信息,意思没有权限访问
2023/12/08 15:14:31 [error] 13305#0: *1 "/root/nginx-1.22.1/html/index.html" is forbidden (13: Permission denied), client: 127.0.0.1, server: localhost, request: "GET / HTTP/1.1", host: "localhost"
既然没权限,那就加上权限,给nginx目录以及子目录都加上最高权限
chmod -R 777 /root/nginx-1.22.1
加完后发现还是一样的错误,依然显示无权限,最后通过ps命令查看nginx进程
root@PW9033927:~/nginx-1.22.1/conf# ps -ef | grep nginxroot 13382 1 0 15:55 ? 00:00:00 nginx: master process /tmp/tmp.JcKnoImyhw/cmake-build-debug/nginx -c /root/nginx-1.22.1/conf/nginx.confnobody 13383 13382 0 15:55 ? 00:00:00 nginx: worker process
发现一个问题,nginx 的master进程所有者是root,而工作进程的所有者是 nobody;nobody是一个默认的系统用户,肯定是没有权限访问root用户的文件;要解决这个问题,就得让工作进程也以root来运行,修改 nginx.conf文件,将# user nobody;改为 user root;
然后重启nginx,在用ps命令查看,可以发现,master进程和工作进程的所有者都是root了
root@PW9033927:~/nginx-1.22.1/logs# ps -ef |grep nginxroot 13632 1 0 16:29 ? 00:00:00 nginx: master process /tmp/tmp.JcKnoImyhw/cmake-build-debug/nginx -c /root/nginx-1.22.1/conf/nginx.confroot 13633 13632 0 16:29 ? 00:00:00 nginx: worker process
页面也已经可以访问成功了,访问的html文件路径 为:/root/nginx-1.22.1/html/index.html